 |
FLNET
7.5
|
 |
FLNET
7.5
|

Flnet provides the Amateur Radio Net Control Station operator with a real time tool to assist him or her in managing the net activities. A single dialog with multiple panels is used to allow rapid entry, search, pick and display of all stations calling in to the net. All operations on the main dialog are accomplished with keyboard entries only. No mouse action is required to perform the net control functions. Experience has shown that most net control operators prefer this method of operation to improve the speed of entry and selection
Invoke flnet by clicking on the desktop program icon. The main dialog will open. If this is not the first execution, the program will load the last used database file. Use the Files menu to either start a new or open an existing database file.
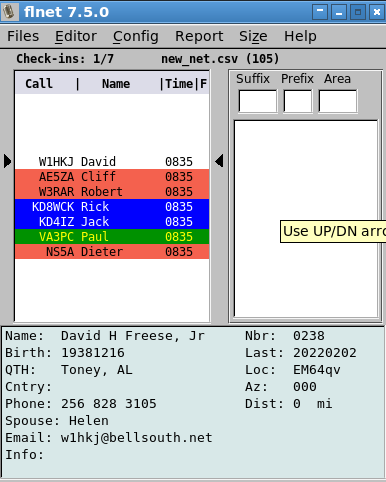
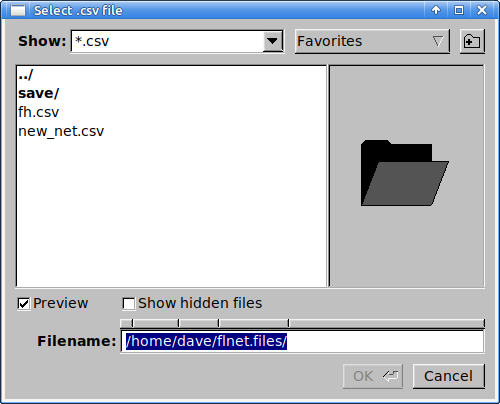
Either select an existing file or enter a new filename with the csv extension. All database files have the extension "csv" which may optionally be added to the filename.
The main window is divided into three sections. The Call In List to the left contains all of the net members callsigns, nicknames and time of login, who have been entered for this session. The data in this window can be scrolled using the UP and DWN arrow keys. The callsign contained within the confines of the two dark arrows is the active call. That will be the person who is presently acknowledged by the control operator. It is significant for another reason. The function keys F1, F2, F3 and F4 when pressed will change the color of that entry to BLACK, BLUE, GREEN or RED respectively. The color coding can be used by the net control operator in any way that he or she chooses. One use might choose to designate.
| Action | Key | Color |
|---|---|---|
| Logged in to the net | F1 | BLACK |
| Acknowledged #1 | F2 | BLUE |
| Acknowledged #2 | F3 | GREEN |
| Logged out | F4 | RED |
The Function keys and colors are assigned in the configuration dialog.
The right most column is a FLAG that specifies some special characteristic about that callsign. For example: this call might be from a mobile operator, or from a QRP station, or a DX station that requires special or early recognition by the net operator. Up to three special flags may be assigned (see configuration information).
Entering a callsign into the "Call In List" is quite simple. Key in the letters associated with the suffix of the call being entered. As each letter in entered the calls which match that sequence will be shown in the pick list just below the Suffix box.
While the various display elements may look like entry fields, scrolling browsers, etc. THEY ARE NOT! All of the things shown on the screen are simple labels that are being manipulated from the keyboard and under program control. Standard GUI controls would have the habit of wanting to control what happens when given keyboard or mouse focus. That would destroy the quick response mechanism associated with the net functionality. You can click your mouse on these controls all day long and nothing will happen. You do not use the mouse for the net control function.
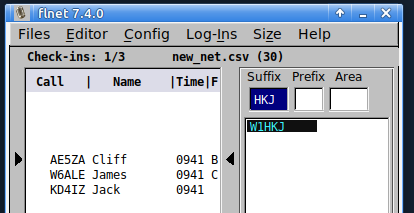
If the desired call is singular in the list or at the top of the list you can select it by pressing the ENTER key. The call will be transfered to the end of the Call In List along with the nick name of that member and the time of logging. If the call is in the list but not at the top, then press the DOWN (or UP) arrow key. Control now passes to the pick list below the Suffix box and the 2nd call in the list will be highlighted RED. You can move between entries using the UP and DOWN arrow keys until the desired call is highlighted. The list wraps from last to first and first to last.
Press ENTER to select the highlighted call.
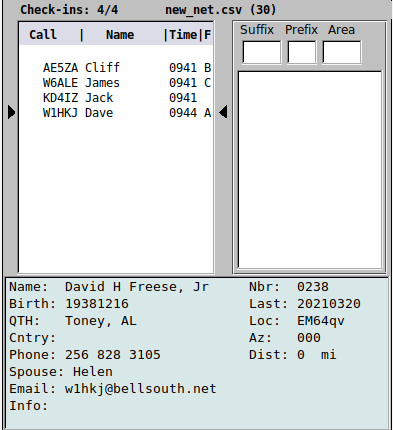
The newly transfered call may or may not be immediately shown in the Call In List box depending on whether the box is presently filled with calls. Do not be concerned. It is at the end of the list. To convince yourself of this, press the END key after making the selection. The last call entered in the Call In List will be moved to the current call position. Pressing HOME will put the first call entered in the current call position.
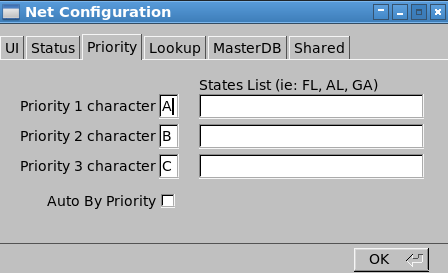
The After Selection image shows the callin list in time order, earliest to last. Note the A, B, C flags indicating a priority ordering. The list can be reordered by priority, and new entries added by priority. Setting the Priority configuration panel item Auto By Priority
changes the callin list to
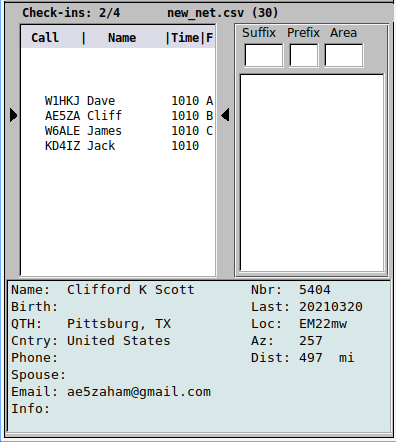
The position of the callin list will change to insure that the current call is at the "up" position as the priority control is toggled. The callin list ordering can be toggled between time and priority order using the combination of alt and P keys.
To assist the NET control operator the call sign and nickname can be transfered to FLDIGI. Select the callsign of the next up net member (between the arrow indicators). Then press the ENTER/RETURN key. The call sign and the nickname will be transfered to fldigi's logging controls. It will be immediately available for use in fldigi's macros.
The operator can abort the selection process at any time by simply pressing the ESC key.
This is because no callsign with that suffix is contained in the database. You may have a new log-in to your net. Press the TAB key to move to the Prefix box. Enter the prefix and then TAB again to move to the Area box. Enter the number for the area and then press ENTER to transfer that new call to the Call In List. You can abort this operation at any time by pressing the ESC key.
The fields displayed in the lower part of the window are the values associated with the Call In List current value. These will change as you move between log-in entries.
You close the program by selecting the menu File / Exit, using the alt-F4 key combination, or the cmd-Q key combination on a Mac. You will be prompted to confirm the program shutdown.

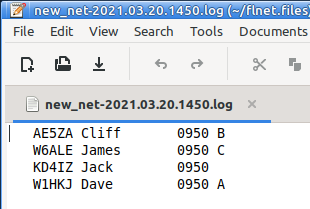
The program will update the database if appropriate and create a daily log if the Call In List contains values. The log is an appended file for each day of operation. The name of the log file is
Where the YYYY.MM.DD.hhmm is the current date/time value. If you open the net multiple times during the day, the data for each session is recorded in a separate file. The data in this file is identical to the Call In List values.
You may close the current database and open a different one by selecting the menu button Files / Open.
You may close the current database and create a new one by selecting the menu butten Files / New.
All of the current information will be saved as when the current data base is closed.
After running flnet for the first time the program will always open the last used database. The name and location of the last used database is stored in the file
$HOME/flnet.files/flnet.cfg
where $HOME is

The database files for flnet are simple comma separated value that can also be opened using a spreadsheet. You should avoid modifying the contents of the file using a spreadsheet program. These files may be stored anywhere on your computer system.
Each time it starts or opens a new database, flnet will create 2 aged backup files of the active database file.
Typical file contents:
While running digital nets using FLDIGI, transfering callsign information from FLDIGI to FLNET is possible. From FLDIGI's receive window double click or right click on the callsign and select the 'call' menu item. This action fills the callsign field. If you have the call lookp feature set up, press the QRZ button to fill in the remaining information fields. Otherwise use the right click menu items to fill in the relavent data.
Return to FLNET's main window (editor window must be closed). Pressing Fll or Shift-F12 transfers the data from FLDIGI to FLNET. If the callsign is not present in the database it will be created and the following data will be assigned; callsign, name, nickname, qth, state, logged date, and join date. The logged in and join dates are set to the local time zone. The transfered callsign will be added to the call-in list.
If additional information needs to be added or updated. Press the up/down key to place the newly entered callsign between the two arrows in the call-in list. Pressing F12 opens the editor window to the selected callsign. The nickname is initially set the the proper first name when the database entry is created. Modify as needed, the nickname is the information passed back to FLDIGI's name field. Add/Modify the other fields as required. Press the update button to save the changes.
Net has a built-in editor for maintaining the its database. You open the editor by clicking on the menu button "Editor" or by pressing the function key F12 to edit the current active call in the call-in list. Of course this is one of those times that you may use the mouse. If you are starting a completely new net database, this is where to start. You probably already have most of the information that will be entered into the database. Once the net membership has been entered into the database the operation as net control operator will be very simple and quick.

These are normal data entry fields. You move between them using the mouse, tabs, backspace, arrow keys etc. The buttons at the bottom of the window are primarily for moving between or acting upon an entry in the database. The arrow keys from left to right allow you to move to the FIRST, PREVIOUS, NEXT or LAST entry in the database. The ordering of the database is controlled by the sort selection of CALLSIGN sort or NET NBR sort. You may also go to a specific data entry using a browse window. The browse window will either be by callsign or by net nbr.
Selecting "Fldigi" menu item will transfer Call Sign, Name, QTH, and State information from the FLDIGI logbook to FLNET. Use of the CALLBOOK feature of FLDIGI is recommended prior to the transfer.
The currently selected database entry can be transfer to the Call-in list by selecting the "Queue" button located at the bottom of the Editor Window.
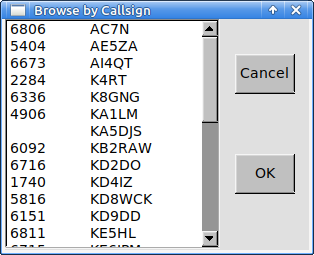
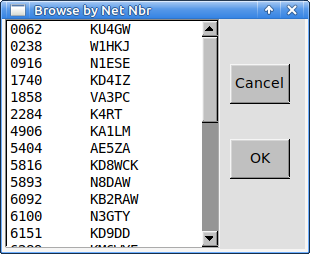
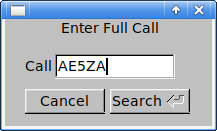
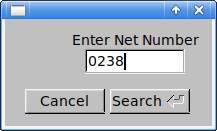
Searches for existing records can be made by either call or net number. A browser selector and search dialog is available for both:
| 
|
Move through either list using the up/down keyboard arrow keys. Home moves to first item. End moves to last item. Select highlighted item using the Enter key or with the OK button. Close the browse dialog using either the close button or with the Escape key.
| 
|
Enter the desired call / net number. You do not need to be concerned about upper/lower case letters. Execute the search by either pressing the Search button or with the Enter key.
flnet can search a variety of external database sources to assist filling in the various database record elements:
Change the sort order of the working database:
Each change to sort order is indicated in the upper right corner label control. Changing sort order does not change the current record.
| Key(s) | Action |
|---|---|
| F1 | Set Color to BLACK - new login |
| F2 | Set color to BLUE - recognized one time |
| F3 | Set color to GREEN - recognized second time |
| F4 | Set color to RED - logged out |
| F5 | Set priority to none - flag is blanked & call moves in list if autopriority is true |
| F6 | Set priority to FIRST - flag changed & call moves in list if autopriority is true |
| F7 | Set priority to SECOND - flag changed & call moves in list if autopriority is true |
| F8 | Set priority to THIRD - flag changed & call moves in list if autopriority is true |
| F9 | Move current call one up in the call-in list |
| F10 | Move current call one down in the call-in list |
| F11 | Transfers data from FLDIGI, creates DB entry if needed, and adds the call to the call-in list |
| F12 | Open editor dialog to current call for update only |
| Shift F12 | same as F11 |
| — | — |
| alt-C (c) | Open configuration dialog |
| alt-E (e) | Open editor to current call with full record access |
| alt-I (i) | Open log-in recap |
| alt-P (p) | Toggle callin list ordering date-time / priority |
| alt-Z (z) | Toggle main dialog size |
| Key(s) | Action |
|---|---|
| alt-B (b) | Open Browser menu items |
| alt-L (l) | Open Lookup menu items |
| alt-M (m) | Open Master menu items |
| alt-R (r) | Open Search menu items |
| alt-S (s) | Open Sort menu items |
flnet 7 data files are ASCII text files. The file format is comma separated value (csv) which is the text file format used by most modern spread sheet programs.
The first line in the file is a header line consisting of the following comma separated strings:
Three fields must be present for flnet to consider the file to contain valid data: PREFIX, AREA and SUFFIX.
The fields can be in any order and flnet will correctly parse the data. Record fields must of course be aligned with the respective header name. For example a file containing records consisting of
ZIP, NAME, SUFFIX, PREFIX, AREA
will be properly parsed. When the data is saved by flnet the missing fields will be added (empty if not edited by the user), and the fields realigned in the default order.
You can open an flnet csv file using Excel, Open Office, Gnumeric, etc. If you modify the file just be sure to save it again in the csv format.

The database file format used in earlier versions of flnet were based on Xbase, which is similar to dbase. These files must be converted to the csv flat file format before using the exported file in flnet 7.x.
Execute the earlier version of flnet. Open the desired dbf file and then open the Editor dialog and press the "Export" menu button:

The file will be saved in the same location as the original dbf file, using the same filename but with the extension csv. flnet 7.x will be able to open and use this file.
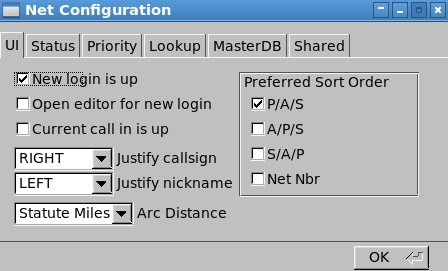
The behavior when logging a new call-in to the net can be changed to suit the way that your net control operates.
New login is up - Every logged in call sign that is not in the database will become the "up" position in the Call In List
Open editor for new login - "New login is up" must also be checked. If both are checked then in addition to being placed in the up position, the editor will open so that details can immediately be added to the database.
Current call in is up - Every new log in will move that entry to the "up" position in the Call In List.
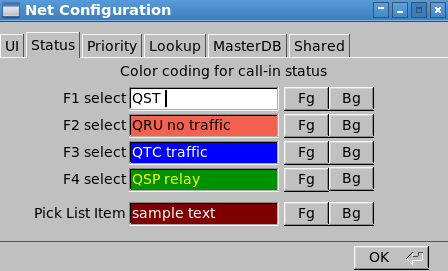
The function keys F1, F2, F3 and F4 when pressed will change the forground and background colors of the current callsign (between the arrows in the Check-ins list). The color coding can be used by the net control operator in any way that he or she chooses. One use might choose to designate
| Action | Color |
|---|---|
| Logged in to the net | BLACK |
| Acknowledged #1 | BLUE |
| Acknowledged #2 | GREEN |
| Logged out | RED |
These are the default colors. You can modify them to suit your operation.

The priority characters can be changed to suit the way that your net operates. You can also specify certain states to have priority during the callin process. This is quite useful for a net with members over a wide geographic region. It might be better to allow certain states / regions early responses to a check in process to accommodate band conditions.
You can check the Auto By Priority box if you want prioritization to be automatic.
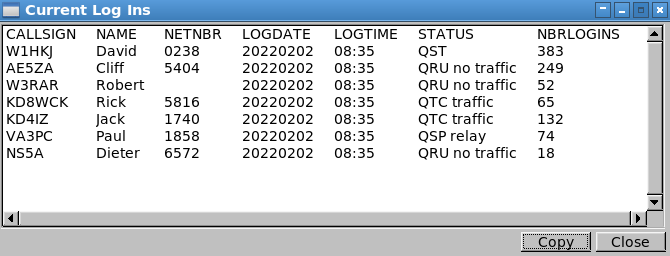
Open the Logins Report dialog using the menu item Reports/Logins. The report format is user configurable. Which fields, and field order are selected using the Select Sort Fields dialog. Open this dialog using the Report/Select fields menu item:
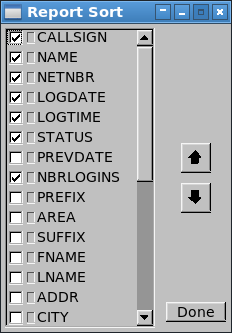
To move a field up (to the left on report), or down (to the right on the report):
Enable the associated check box to activate the field on the report.
All configuration changes and changes to the log-in list will be immediately reflected in the reports dialog.
The copy button puts a space filled replica of the reports dialog contents in the system clipboard. You can then paste the clipboard contents into any clipboard aware control, a text editor, the fldigi transmit panel, etc.

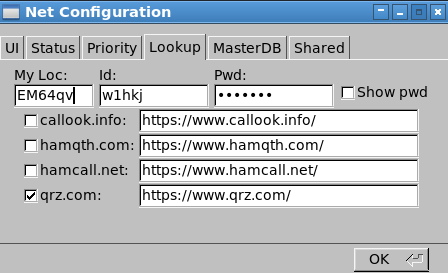
Enter your user name and password (if required) and select the on line database to access for online lookups.
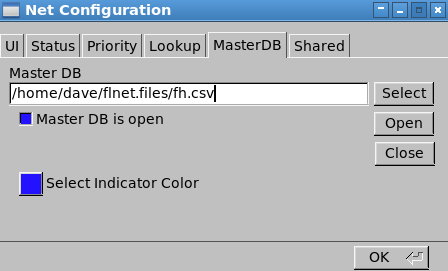
Assign a local flnet style csv file to use as a Master database.
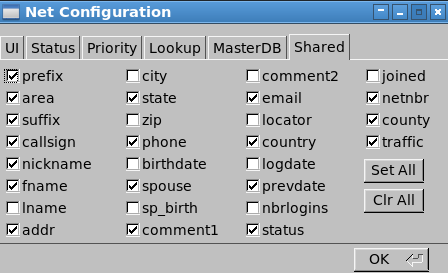
Select which fields will be shared between the working and master database.

The Warning Box indicates FLNET is unable to transfer data to/from FLDIGI.
The primary reasons for this failure are:
    --help this help text
    --version
    database.csv
    open 'named' database file.
    --xmlrpc-server-address <ip_addess> default:127.0.0.1
    --xmlrpc-server-port <port> default:7362