Table of Contents
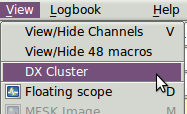
fldigi can connect to and display data from DX cluster servers. The three most common server types are AR-Cluster, CC-Cluster, and DX Spider. Open the dxcluster dialog from the View menu:
Logging on to remote host
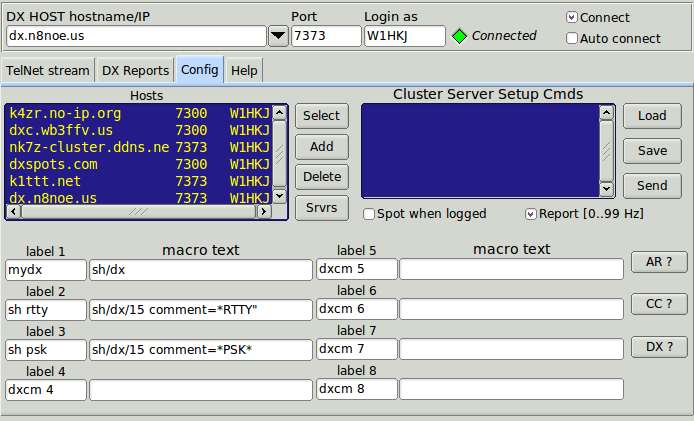
Enter the DX HOST hostname/IP, the Port and your Login call. Then check the "Connect" control. The "Connected" label will be visible only after the remote host connection has been been made. The above dialog shows the 4 hosts that I routinely use.
- k4zr.no-ip.org, a DX Spider server
- dxc.wb3ffv.us, a DX Spider server
- nk7z-cluster.ddns.net, an AR Cluster server
- dxspots.com, a CC Cluster server
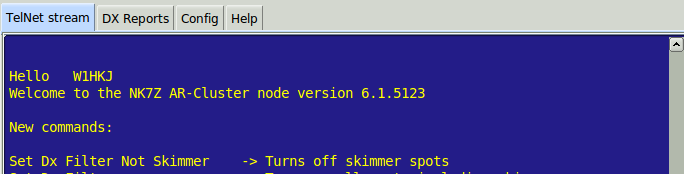
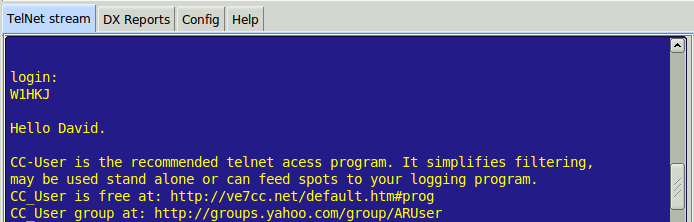
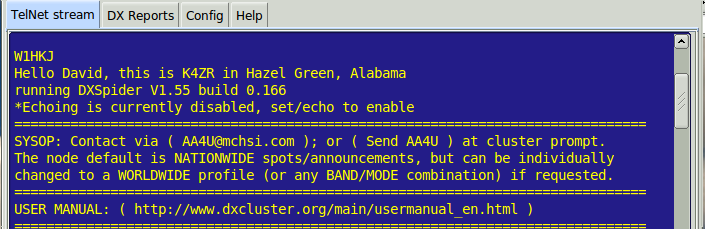
Immediately after checking the "Connect" control the dxcluster dialog should change to the "TelNet stream" tab. This tab displays the raw telnet data stream, shown here for the three server types:
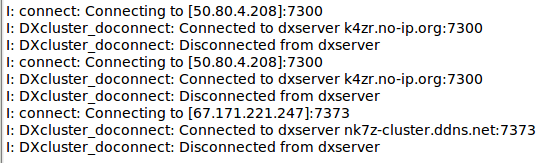
The dxcluster connect and disconnect events are recorded in fldigi's event log.
Configuring
Managing Hosts
You can maintain a list of remote hosts to which you can reliably connect and which provide good information relative to your QRA (Maidenhead locator). The following refers to the Config tab on the dxcluster dialog as shown above.
- Add the current host to the list using the "Add" button.
- Highlight an entry and press the "Select" button to transfer the elements to the connect controls.
- Highlight an entry and press the "Delete" button to delete an entry.
- Use the menu item "Configure / Save Config" to save the modified list. It will be restored the next time fldigi is executed.
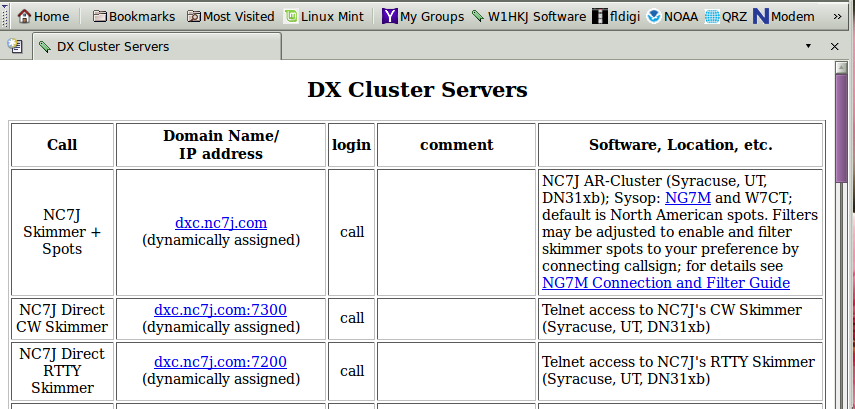
Press the "Servers" button if you are unfamiliar with the telnet address and port number of a convenient dxcluster server. fldigi will open up a local html document with a list of recently verified servers:
Initial Host Commands
Most cluster servers will save your setup commands from a previous telnet session. You can also store those commands in the text editing control, "Cluster Server Setup Cmds."
You can save and reload any number of command sequences. Each is saved in a plain text file in the fldigi files subfolder "Scripts". The default extension for the dxcluster scripts is "dxc". Be sure you add the extension to your saved files. It will not be added if you do not with the result that file may not be visible when you try to load it.
Send the script to the remote server using the "Send" button. The transmission and response will be available for viewing on the "TelNet stream" tab.
Command Macros
Configure each of the 8 command macro buttons. The m1...m8 controls are the button label and the corresponding multi-line text control are the associated server commands.
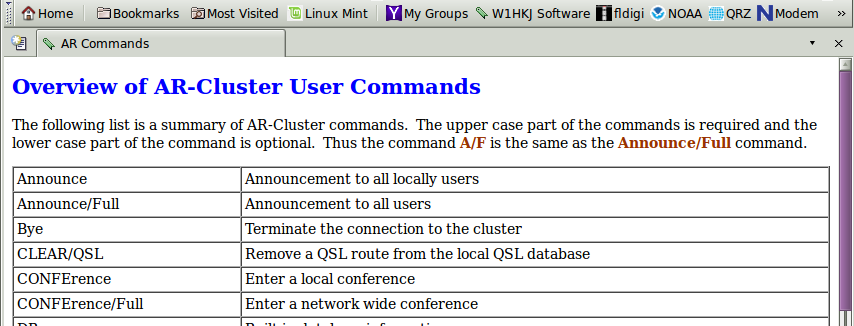
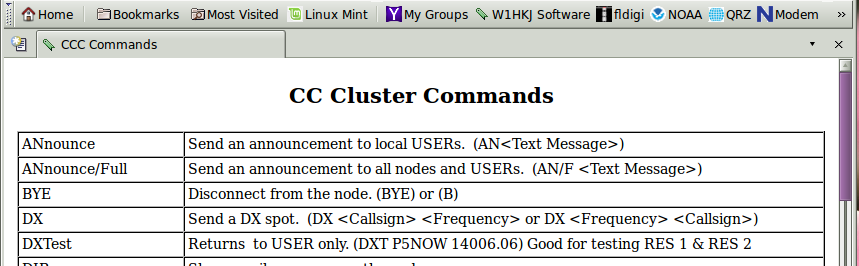
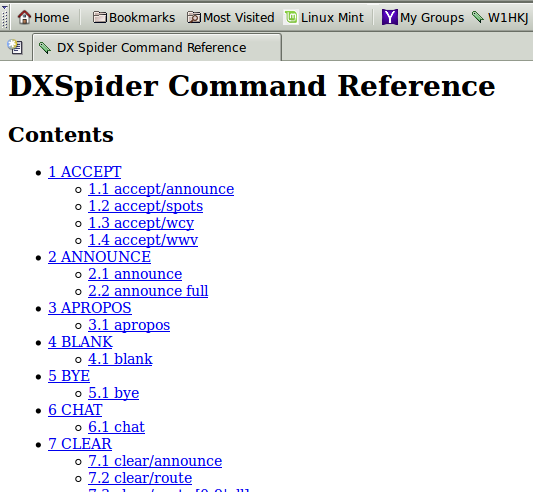
DX cluster command help can be viewed for each of the 3 server types.
Press the corresponding help button:
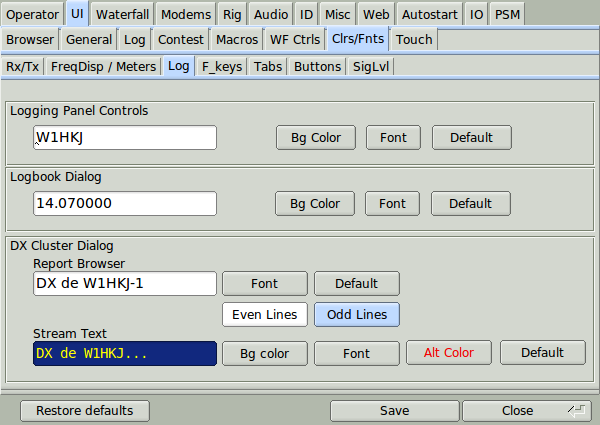
DX cluster color scheme
You can change the text colors, and text fonts from the main fldigi configuration dialog:
Spot when logged
Enable the "Spot when logged" check box if you want to create the spot report whenever you log a contact from the fldigi main dialog. You will still have to review the spot report and submit it with the Submit button.
Auto Connect to Host
Enable the "Auto Connect" if you want to connect to the host when starting fldigi.
TelNet stream
The raw data to and from the cluster server is shown on the TelNet stream tab. Sent data is in red and received data is in black. The image shows the automatic log on activity between my station and the K4ZR DXSpider cluster server. Those 4 lines are created based on your fldigi user configuration.
The TelNet stream text display is context sensitive to the right mouse button. You can copy marked text or delete the display contents using the right mouse button.
You can send individual commands to the remote host using the "Cmd:" control. Enter the command, for example: "SHow/FILTER", or "SH/FILTER". Then press the "Submit" button. The command string will be sent to the remote server and you can view the results on the "TelNet stream" tab.
During a logon to the remote host fldigi will send some default commands depending on the host type. If the remote host is either an CC-Cluster or DX Spider host then fldigi will send this sequence:
     set/page 0
     set/name [user name]
     set/qth [user qth]
     set/qra [user locator]
Where the [] values are those entered on the main "User" configuration tab.
Sending prepared (macro) commands or dx spot reports to the remote server is either a single or two step process.
- Pressing any of the 8 macro buttons will transfer the macro string to the Cmd: control. You can modify the command string before pressing the Submit button.
- The command will be executed immediate upon pressing the macro button if the command text contains the exclamation mark ! as the first character.
Submitting a spot
You generate a spot report using the Spot button on the TelNet stream tab. Fldigi will generate a spot report that tries to provide the cluster with some mode details. For example:
dx 3512.4 K2LBM RTTY [85]       mode is RTTY, Mark frequency @ 3512.485
dx 3581.1 K2LBM MFSK16 [50]     mode is MFSK16, center frequency @ 3581.150
dx 3580.8 K2LBM OLIVIA [00]     mode is OLIVIA (8-500), center frequency @ 3580.800
Unfortunately, the ADIF mode specifier does not provide details reqarding mode characteristics. The [0..99] values in the notes field denote the additional Hertz and tens-of-Hertz needed to specifiy the frequency to the nearest Hertz rather than rounded as is usually reported in the cluster spot report. This field is only added to the report if the "Report [0..99 Hz]" control is enabled on the dxcluster configure tab.
Pressing either of the SPOT buttons only adds the spot report to the Cmd: control. You can then modify the spot report before actually submitting the report using the Submit button.
DX cluster reports
fldigi parses the received data stream and displays each dx spot in a tabular form on the "DX Reports" tab:
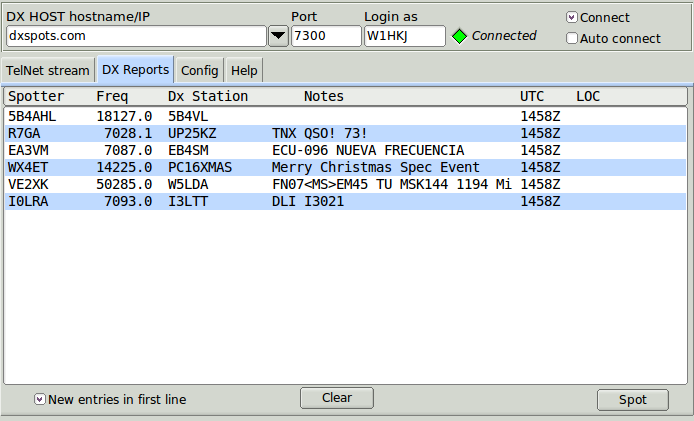
Left clicking on a spotted report line will transfer the frequency and mode to fldigi's operating parameters. The mode change is contingent on the mode being reported by the spotter and included in the 'Notes' block.
You can elect to view the reports with the most recent on either the top or the bottom of the list.
DX Cluster QSY logic
A cluster spot report line has this format:
-SPOTTER---<-FREQ--><--DX STA---><----------NOTES--------------><-UTC><LOC--
KB8O       14240.0  D66D         up 10 59 Ohio                  2059Z EN81
fldigi will change mode if and only if the NOTES block contains a valid ADIF mode specifier, i.e. CW, PSK31, QPSK63, RTTY, etc.
The QSY logic does not make any assumptions regarding band, sub band in determining the RF carrier and AF injection frequency.
If the fldigi mode is SSB (available on the mode menu), then the QSY is to the FREQ value with no change in the WF tracking frequency.
Otherwise the existing mode or the mode detected in the NOTES is used to determine the QSY values:
CW:   QSY is based on the CW sweet spot
RTTY: QSY is based on the RTTY sweet spot
PSK:  QSY is based on the PSK sweet spot
DIGI: QSY is based on the PSK sweet spot
Most DX reports do not include a mode usage. Ergo it is up to the user to know what mode he or she is interested in. Are you spotting SSB, then change the fldigi mode to SSB. Are you interested in CW? Then change the mode to CW. This is really a KISS approach that is constrained by the very limited amount of data contained in the DX spot report.
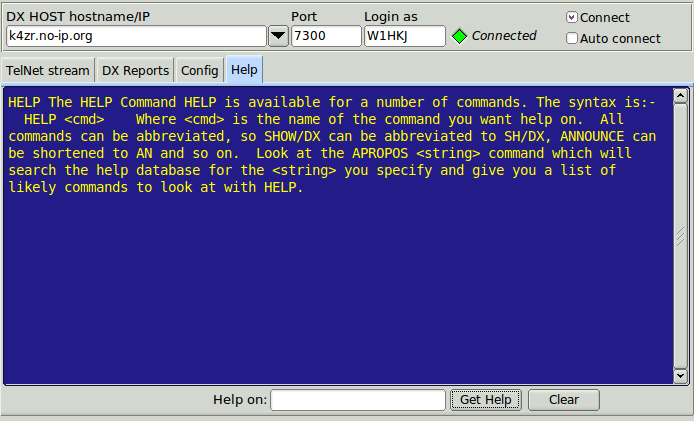
On Line Cluster Help
The Help tab provides a convenient access to help obtained directly from the dxcluster server. It is the equivalent of using the HELP command from the Cmd: control. The difference is that the server reply is parsed and presented in a separate text viewer.