Table of Contents
MFSK16 and MFSK8 are multi-frequency shift keyed (MFSK) modes with low symbol rate. A single carrier of constant amplitude is stepped (between 16 or 32 tone frequencies respectively) in a constant phase manner. As a result, no unwanted sidebands are generated, and no special amplifier linearity requirements are necessary. The tones selected are set by the transmitted (4 or 5 bit) bit pattern and a gray-code table.
The mode has full-time Forward Error Correction, so it is very robust. Tuning must be very accurate, and the software will not tolerate differences between transmit and receive frequency. The mode was designed for long path HF DX, and due to its great sensitivity is one of the best for long distance QSOs and skeds. MFSK8 has improved sensitivity, but is very difficult to tune, and suffers more from Doppler. It is useful as the band fades out.
MFSK-32 and MFSK-64 are high baud rate and wide bandwidth modes designed for use on VHF and UHF. These are very useful for send large documents or files when some transmission errors are can be tolerated.
This is an example of properly tuned MFSK16 signal with a s/n of approximately 9 dB.

The same signal viewed with the waterfall expanded to the x2 factor.
MFSK Picture Mode
Fldigi can send and receive images using all MFSK baud rates. When operating with other modem programs you should limit sending pictures to the MFSK-16 baud rate. The program can send and receive MFSK images in both black and white and in 24 bit color. The transmission mode for MFSKpic is similar to FAX.
Reception of an MFSKpic transmission is fully automatic. The MFSKpic transmission has a preamble sent which will be visible on the text screen. The preamble reads as "Pic:WWWxHHH;" or "Pic:WWWxHHHC;" for b/w or color respectively. The WWW and HHH are numbers specifying the width and height of the picture in pixels.
The successful reception of a MFSKpic is highly dependent on s/n conditions. The data is transmitted as an FM modulated signal and is subject to burst and phase noise on the transmission path. It can provide excellent photo transmission on a really good path.
Images should be carefully selected for size before beginning a transmission. To calculate the transmit time for an image use the following formula:
Time(sec) = W * H / 1000 for black and white
Time(sec) = W * H * 3 / 1000 for color
Where the W and H are the dimensions of the photo in pixels. A 200 x 200 image will take 120 seconds to transmit in color and 40 seconds to transmit in b/w. The symbol rate for this mode is 1000 data bytes per second. The color image consists of 3 bytes; red, blue and green for each pixel.
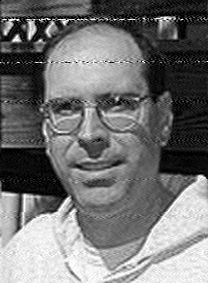
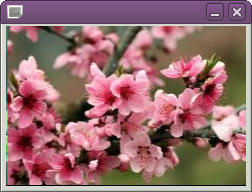
This is an example of a picture received live on 80 meters (thanks K0OG)
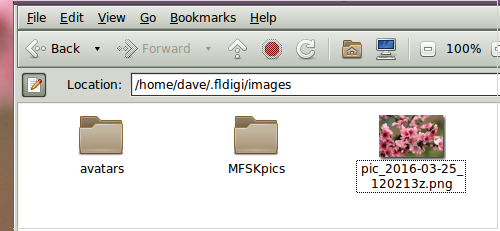
Received images are saved in the default folder $HOME/.fldigi/images (Linux) or <defaultpath>/fldigi.files/images (Windows).
Transmitting an Image
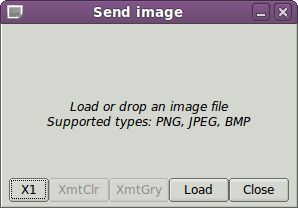
You can only transmit an image while in the MFSK-16/32/64/128 modes. The image can be prepared for transmission while in the receive mode. Right click in the transmit text box and select "Send Image" from the popup menu. This will open up the transmit image dialog which will be blank to start.
Press the "Load" button and a file selection dialog will allow you to select a suitable image for transmit. The file selection dialog also has a preview capability so you will see what the image looks like.
You may also open a window manager file browser and drag and drop an image to the center part of the Send image dialog.
The "X1" button is a three-way toggle that allows you to transmit an image file in
X1 - normal and compatible with other modem programs
X2 - double speed, and
X4 - quadruple speed. X2 and X4 are fldigi specific image modes.
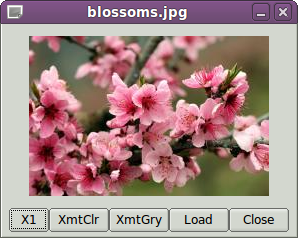
The Send image dialog after the image was drag and dropped onto the dialog.
The properties box said this image was 120 x 119 24 bit color. So it should take 42.8 seconds to transmit in full color. You can send a color or a b/w image in either color mode or b/w mode. If you transmit a color image in b/w the program will convert the image before transmitting. If you transmit a b/w image as full color you are in effect transmitting redundant information, but it can be done. I selected the "XmtClr" button for a trial run. Pressing either the "XmtClr" or "XmtGry" will put the program and the transceiver into the transmit mode if it was in the receive mode. The image is cleared and then repainted as the transmission proceeds. You see the same image progression that the receiving station should see. The main display also displays the % completion on the status bar. Hold the mouse over either the XmtClr or the XmtGry button and the tooltip will tell you the transmit time for this image.
You may abort the transmission at any time by pressing the "Abort Xmt" button. That will return you to the text mode for MFSK. You will then have to toggle the T/R button if you want to return to receive.
There is an alternate way of sending an image, but one which only transmits a color image with no provision for slant correction. This may be more convenient for sharing images when you do not need the additional utility of the image dialog.
Open a file folder to the location of your image files that are suitable for MFSK transmission. These images should be constrained to be 240 x 200 or less for reasonable transmit times. Optionally prepare fldigi for the MFSK image transmission by entering some suitable text to precede the transmission.
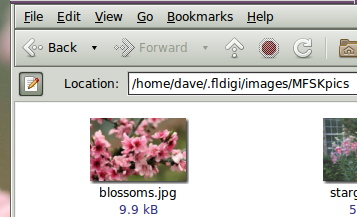
You may be sending the image, blossoms.jpg, for example.
One might enter:

Then drag and drop the the image file from the files folder to the transmit text panel in fldigi.
The TX panel text will then change to

The ^! is the character sequence used by the fldigi TX parser to indicate that there is a pending execution command. In this case it is to transmit the blossoms.jpg file.
Add some suitable ending text and the sequence ^r to the next line and then press the T/R button (if not already transmitting). At the end of the image the TX parser will find the ^r and return the program to the receive mode.
The Rx panel will echo the transmitted data:

The image progress dialog will close at the end of the image transfer.
Receiving an Image
The receiving program decodes the "Pic:240x160C;" as a color picture 240 wide by 160 high.
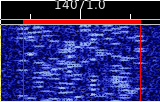
This is what the waterfall will look like during the reception of an MFSK-64 image.
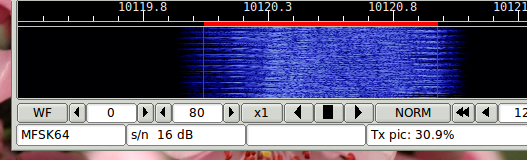
The actual spectrum signature will vary with the image bytes being transmitted. The image was being transmitted in 24 bit color for this screenshot. The waterfall clearly shows that the image transmission is within the bandwidth occupied by MFSK-64.
Received images are automatically saved to the images folder and annotated with a date-time stamp.
Picture with a slant
If either the send, receive or both ends of the transmission are using an uncalibrated sound card whose sampling rate is not an exact multiple of 8000 Hz the resulting picture at the receive end will appear slanted. The degree of slant is directly related to the accumulation of the frequency error at both ends of the transfer. Stations wishing to send and receive MFSK pic's should calibrate their sound card. The WWV calibration mode is used to measure and set the parts per million (ppm) correction factor for the sound card.
Your sound system may be fully corrected, but the sending station may have an uncorrected sound card. You can usually correct for small errors in the following way. After the full picture is received move the mouse to bottom left or right corner of the slanted images (the corner that clearly visible). Then left click on that corner. The program will correct for the slant. The correction will not be perfect but it may help to make the image more viewable. Right click to undo the slant correction. Slant corrections are not saved to the Rx image file.